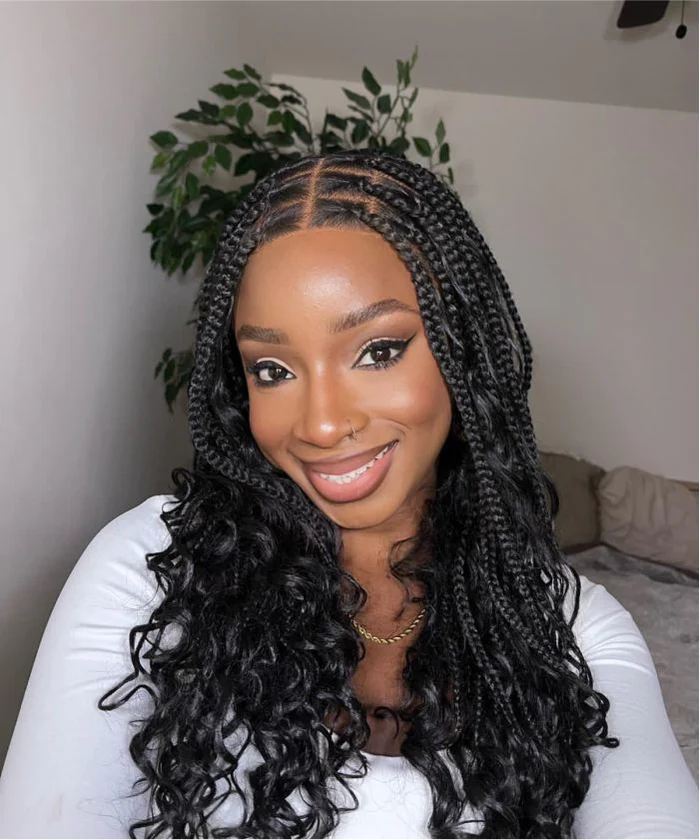
When it comes to achieving gorgeous curls in your braids, you might think that rollers or heat tools are the only way to go. However, there's a simple, heat-free method that can give you stunning results: hot water. How to curl braids with hot water without rollers? This article explores the magic of using hot water to create fabulous braid curls, saving you time and protecting your hair from potential heat damage.

The Benefits of Hot Water Curling
Before diving into the technique, let's explore why hot water curling is such a game-changer for braids with curls:
-
Heat-Free: Unlike rollers or curling irons, hot water curling doesn't require any direct heat application to your hair. This means less potential for heat damage, breakage, and dryness, keeping your braids healthy and strong.
-
Time-Saving: With hot water curling, you can achieve a full head of gorgeous curls in a fraction of the time it would take with traditional curling methods. No more spending hours meticulously wrapping each braid around a roller or wand.
-
Long-Lasting: When done correctly, hot water curls can last for several days, maintaining their shape and bounce through multiple styling sessions. This means less daily maintenance and more time to enjoy your fabulous curls.
-
Versatile: Hot water curling works on all types of braids, from box braids to knotless braids and everything in between. No matter your braid style or length, you can achieve stunning curls with this technique.
You may like: Time Investment for Small Knotless Braids: How Long Does the Styling Really Take?
Step-by-Step Guide to Hot Water Curling
Now that you know the benefits, let's walk through the process of curling your braids with hot water:
Step 1: Prep Your Braids
Start with freshly washed and moisturized braids. If your braids are feeling dry or brittle, give them a quick spritz with a leave-in conditioner or braid spray to add moisture and softness. Make sure your braids are completely dry before moving on to the next step.
Step 2: Boil Your Water
Fill a large pot or kettle with water and bring it to a boil. You'll need enough water to fully submerge your braids, so choose a container that's deep enough to accommodate the length of your braids.
Step 3: Prepare Your Braids
While your water is boiling, divide your braids into manageable sections. If you have longer braids, you may want to work with smaller sections to ensure even curling. Gently comb through each section to remove any tangles or knots.
Step 4: Dip and Swirl
Once your water is boiling, carefully dip each section of braids into the water, making sure they are fully submerged. Use a wooden spoon or tongs to gently swirl the braids in the water for 10-15 seconds, ensuring even heat distribution.

Step 5: Squeeze and Cool
Using your wooden spoon or tongs, carefully remove the braids from the water and gently squeeze out any excess water. Be careful not to burn yourself, as the water will be very hot. Allow the braids to cool for a few seconds before handling them further.
Step 6: Style and Separate
Once your braids are cool enough to touch, gently separate them and style them as desired. You can create a variety of looks by manipulating the position and direction of your curls. For looser, more voluminous curls, gently tug on each braid to stretch out the curl pattern.
Step 7: Let Them Set
Allow your curls to air dry completely before adding any additional styling products or accessories. This will help your curls set and maintain their shape for longer. If you're in a rush, you can speed up the drying process by using a hooded dryer on a low, cool setting.
You may like: Find Your Dream 'Do: Braids with Curls for Your Face Shape
Tips for Perfect Hot Water Curls
To ensure the best results when curling your braids with hot water, keep these tips in mind:
-
Use a deep conditioner or mask on your braids before curling to add moisture and prevent dryness.
-
Make sure your water is at a rolling boil before dipping your braids to ensure maximum heat penetration.
-
Work in small sections to ensure even curling and prevent tangling.
-
Don't leave your braids in the water for too long, as this can cause damage and frizziness.
-
Handle your braids gently when squeezing out excess water and styling to prevent frizz and maintain curl definition.
-
Experiment with different dipping techniques and curl placements to create a variety of looks, from tight spirals to loose, beachy waves.

You may like: Chic Braids with Curls Hairstyles in 2024: The Ultimate Hairstyle Fusion!
Conclusion
Curling your braids with hot water is a simple, heat-free technique that can give you fabulous results in a fraction of the time. Whether you're rocking box braids wig, knotless braids, or any other braided style, hot water curling can help you achieve gorgeous, long-lasting curls without the need for rollers or heat tools.
By following the step-by-step guide and tips outlined in this article, you can master the art of hot water curling and enjoy stunning braids with curls that are healthy, bouncy, and full of life. So the next time you're looking to switch up your braid style, give hot water curling a try and discover the magic for yourself!


Share:
Boho Beauty's Potential: Evaluating Boho Braids for Extended Endurance
Maintain the Magic: Our Guide to Extending the Life of Boho Braids